Showing posts with label RECIPES. Show all posts

Monday, March 23, 2009

Happy Spring, Happy Smiles


Happy Spring! Little by little we are seeing the signs of spring - pussy willows, tulips and daffodils just starting to peak their heads up from the earth. It sure is beautiful this world God created!


Its hard to believe, yet again, that time is a tickin' away ever so fast! Baby K will be 11 weeks old this week! She sure is a delight to our family! She loves to smile and coo and kick! She has a very sweet disposition :) See the outfit she is wearing in these pictures? Her big sister M wore it when she was a wee babe. Here, let me see if I can find a picture:


Wow! Thank goodness for dates on digital pictures - I would have thought that was Baby K! My husband jokes with everyone that we only know how to make one kind of baby :) He's right - they sure do look alike. Oh, my heart is swooning this morning looking at how little M was. As I will update you in a bit - she is ever so big these days! Here are some more smiles of Baby K :) You can see why we keep a hat on her so much as in the picture above! She is so bald! It makes me feel like she's warmer with a little cap on :)


Happy Baby!
~~~~~~~~~~~~~~~~~~~~~~~~~~
Now to update you on our family, we have had a very hard winter with sicknesses. Pneumonia, bronchitis, influenza (the real deal - tested positive at the docs!), stomach bugs, etc. Believe you me, I have had my moments where this has just worn me down. But today, now that everyone seems to be on the up and up, I look back to this winter and see how gracious God is in how He's carried me through. As I've shared, our oldest son has asthma and allergies. I spent the first two years of his life so angry at anyone and everyone whenever he was sick, which was a lot. As I continue on my mothering journey, I realize, it is all in God's hands!

There is a purpose when my little ones get sick. It was so hard to see that the week when all four of my children were sick, and my husband and I were up all night with all of them. It was difficult to see again when my little girl M had a fever of 104.9, and then a few nights later of 105.4. But God didn't allow these sicknesses to happen just to kick me when I was down, as He looked down from heaven laughing away! No!

God never promised me that it would be easy (like I needed to tell you this as you think about your struggles), but God DID promise He would never leave me, nor forsake me (Hebrews 13). I recently came across this story that really says what I am trying to say, so much better!
The Road of Life

At first, I saw God as my observer, my judge,
keeping track of the things I did wrong,
so as to know whether I merited heaven or hell when I die.
He was out there sort of like a president.
I recognized His picture when I saw it,
but I really didn't know Him.
But later on when I met Christ,
it seemed as though life was rather like a bike ride,
but it was a tandem bike,
and I noticed that Christ was in the back helping me pedal.
I don't know just when it was that He suggested we change places,
but life has not been the same since.
When I had control, I knew the way.
It was rather boring, but predictable . . .
It was the shortest distance between two points.
But when He took the lead, He knew delightful long cuts,
up mountains, and through rocky places at breakneck speeds,
it was all I could do to hang on!
Even though it looked like madness, He said, "Pedal!"
I worried and was anxious and asked,
"Where are you taking me?"
He laughed and didn't answer, and I started to learn to trust.
I forgot my boring life and entered into the adventure.
And when I'd say, "I'm scared," He'd lean back and touch my hand.
He took me to people with gifts that I needed,
gifts of healing, acceptance and joy.
They gave me gifts to take on my journey, my Lord's and mine.
And we were off again.
He said, "Give the gifts away; they're extra baggage, too much weight."
So I did, to the people we met, and I found that in giving I received,
and still our burden was light.
I did not trust Him, at first, in control of my life.
I thought He'd wreck it; but He knows bike secrets,
how to make it bend to take sharp corners,
knows how to jump to clear high rocks,
knows how to fly to shorten scary passages.
And I am learning to shut up and pedal in the strangest places,
and I'm beginning to enjoy the view
and the cool breeze on my face
with my delightful constant companion, Jesus Christ.
And when I'm sure I just can't do anymore,
He just smiles and says . . .
"Pedal."
-- author unknown
~~~~~~~~~~~~~~~~~~~~~~~~~~~~


During our recent bout with influenza, my little girl here M decided she was ready to go poo and pee on the potty. This was a little inconvenient for me doncha know. But what was a Mama going to do? She was ready, and I just needed to pedal :) With no work whatsoever, this precious girl of mine is now fully potty trained! Just when I'm ready to let her go through the night without a diaper, she'll have a little accident during the night, so we'll keep the diapers at night for now :) Hey, I'm just glad she did the hard work for me :) Potty training is one of those things I'd gladly hire out if I could! Oh, and don't tell her, because she hasn't realized yet, but I took her pacifier away over a week ago (yeah I know - she was a little old for it).

~~~~~~~~~~~~~~~~~~~~~~~~~~~~~

Back In the Kitchen Again

After what seems like years (it probably was!) I am back in the kitchen again, cooking away! It has been so fun! I'm back to baking bread - I even baked our hamburger buns for our sloppy joes last night! I'm not a New Year's resolution kinda gal - but this year I did make one - to memorize a few basic recipes to keep under my belt. So far I've memorized pancakes from scratch, and a master cookie recipe. I'm now working on my rustic Italian bread recipe to keep tucked back in my brain. What time this saves not having to go look up a recipe!

PANCAKES

Thanks to NancyToday, I've learned a fantastic, from scratch pancake recipe. Throw away the bisquick! This is WAY easier in my opinion (and so much more filling as it has protein in it)!

You simply need to remember the number ONE and a list of ingredients. If you need to increase your amount of pancakes for a larger crowd, just multiply one by the number of batches you need :)

Take 1 egg, 1 teaspoon of oil, and 1 teaspoon of sugar and whisk it good in your dish. Then add 1 cup of milk and whisk that with those ingredients. In another bowl, take 1 cup of flour and 1 teaspoon baking powder, and whisk those together. Add the flour mixture to the milk mixture and you have delicious pancakes batter :) To give you an idea of how much this serves, doubling it is perfect for my family. I've made pancakes every morning now for a week, and plan to keep doing this every morning I can. For one it is CHEAP, for two it is HEALTHY, and for three, nothing feels better than sending your husband and son off for the day with a warm filling breakfast in their tummies :) Come on, you can do it too :)

Well, I better go keep my day going. God bless you this week!

Monday, November 10, 2008

Bagel Bliss

I've never even considered making bagels before. I don't know, it always seemed impossible, although admittedly I never even looked at a recipe! Sometimes you have to stop and look into something rather than continually dismissing it, because often, you may be surprised.

And surprised is what I am about HOW EASY making bagels are. Now, as I write this, I'm trying to determine whether it is easy because I know how to make bread, or if its easy, because I have had many, many, MANY failed attempts at baking bread, and this is easier than baking bread. In other words, I'm not sure if one should "master" making bread first before making bagels, or if, like I, you have had many, many, MANY failed attempts at bread baking, if you should put that to the side and try this first. I don't know - I think everyone should try this - it was fast and fun! Enough rambling, let me give you the recipe (with my many comments):

First, I found the recipe at this link:

You can go there directly to get the exact recipe. I will give you my comments based on the above recipe.

INGREDIENTS:

2 cups warm water (I always just take hot water from my tap)
4.5 teaspoons of yeast
3 tablespoons of sugar
1 tablespoon of salt*
5.5-6 cups of flour

*(I DID NOT USE SALT - I'VE LEARNED THAT SALT INHIBITS YEAST, AND ONE OF THE COMMENTS ON THE WEBSITE SAID THAT SHE HAD TROUBLE WITH THE BAGELS RISING. I HAD NO TROUBLES WITH RISING)

Directions

1. I combined the water, sugar, and yeast in my stand mixer. I let this sit for a few minutes until the mixture started to get foamy.

2. I added 3 cups of the flour to the yeast mixture and combined it. I then added the remaining flour about 1/2 cup at a time until a ball forms. After the dough had enough flour, I had the machine knead it for about 3 minutes, adding more flour a little at a time if necessary.

3. I then added 2 teaspoons of cinnamon and a handful of raisins (cinnamon/raisin bagels are my kids' favorite). I had the machine knead in the ingredients until just combined, about 1 minute. I then lifted the dough ball, sprayed the bowl, turned the dough over, giving one last little spray to the top of the dough. I covered it with a towel and let it rise (1st RISE) for 20 minutes.

4. After the dough is risen (it just about doubled in size). I punched the dough down and placed on a floured work surface. I separated the dough into 16 portions (next time I may do 24 as the bagels were rather large). I did this by pinching off the dough. I've read that if you cut the dough with a knife, it breaks apart the gluten strands, and well, that is what keeps bread together! I chose the "finger in the middle method" as described on the website above. Basically, I took the dough portions, very gently rolled it in my hand (the dough doesn't rise much at the 2nd rising, so only do this if necessary - I didn't have to roll all of them). I then placed the dough on the floured counter, poked my finger through the middle. While my finger remained in the dough, I made the dough do a "hula-hoop" around my finger - or imagine the counter is a cup of coffee, and your finger the spoon, and stir :) I hope that explains it well.

5. I put parchment paper on my baking sheets, and placed the formed bagels on them. I covered with plastic wrap that had been sprayed on one side with nonstick spray. I placed them in a draft free location and let them rise at room temperature until puffy, about 20 minutes.

6. Meanwhile, I added water to a 5 quart soup pot, and set to boil. After the 2nd rise, I dropped the bagels one at a time into the boiling water. I boiled the bagels about 3-4 at a time or only so many that they float freely, and are not crowded. I let them simmer for 30 seconds on each side, turning with a slotted spatula. I removed and placed them gently on a lightly greased cooling rack for a few minutes to drain.

7. Once all the bagels were boiled and drained, I placed them back on the baking racks lined with parchment paper and then sprayed them all with my non-stick spray.

8. I then baked the bagels for 20 minutes at 400°F.
We didn't wait very long for them to cool, although we did for a little bit.
They came out perfectly! Very moist on the inside, and a little chewy on the outside (like every good bagel should be). We lathered them while still warm with cream cheese and called it lunch! (by the way, these are all pictures I took just a few minutes ago, they even look like bagels!)


You HAVE to try it! I am planning on looking up how to make "Everything" bagels as those are my husband's favorite. On the website, it said you can split the dough at a certain point, and add different ingredients to each dough batch. Maybe I'll try that, or judging how fast we may go through these, I'll probably just make one normal batch of each flavor.

Happy bagel-ing :)

Thursday, July 24, 2008

Cheesy Brown Rice Casserole

This was so yummy! I panicked coming to post this, because I could not find the link to the recipe that I originally found. But the more I think of it, I did not even come close to using that recipe anyway! So I will post the recipe just as I made it!

Cheesy Brown Rice Casserole

Preheat oven to 375 degrees.

1+ tablespoon of butter
1 medium onion, chopped
2 cloves of garlic, minced
2 cups brown rice, COOKED
4 oz. whipped cream cheese (or regular cream cheese at room temperature, I used whipped right from the fridge)
1/2 teaspoon dried basil leaves
4 oz. cheddar cheese, shredded

Heat butter and cook onion and garlic until the onion is translucent.

In a large bowl, combine the rice, cream cheese and basil. Add the onion mixture. Spoon this into a 1-quart casserole dish. Bake uncovered for 25 minutes. Remove from oven and sprinkle with shredded cheddar cheese. Let sit for 10 minutes, allowing the cheddar to melt.

This was so good! It tasted like risotto - but WAY easier to make than risotto - have you ever made that? VERY time consuming (even though it is the best comfort food ever!)

Enjoy!

Wednesday, July 23, 2008

Plain Cheap Muffins

I whipped up these muffins last night for dinner. The recipe comes from http://www.hillbillyhousewife.com/, if you've never checked this website out, you should, it has a lot of great ideas!
Plain Cheap Muffins
Preheat oven to 400 degrees.
Ingredients:
1/4 cup oil (I used 1/4 cup melted butter - so yummy!)
1 egg
1 cup milk
1/4-1/2 cup sugar (I used closer to 1/2 cup)
1/2 teaspoon salt
1 tablespoon baking powder
2 cups flour
In a large bowl, combine the first 5 ingredients (if using melted butter, add the milk slowly to the butter while whisking before the egg so you do not scramble the egg!). Whisk well. Measure in baking powder and flour. Mix well until all dough particles are moistened. **Do not over mix!! 20-30 strokes is enough** Turn muffin mix into well oiled muffin tins (I used a 12 muffin tin). Bake for 20 minutes.
Very yummy and very cheap ;)

Tuesday, January 8, 2008

A Salad Bar


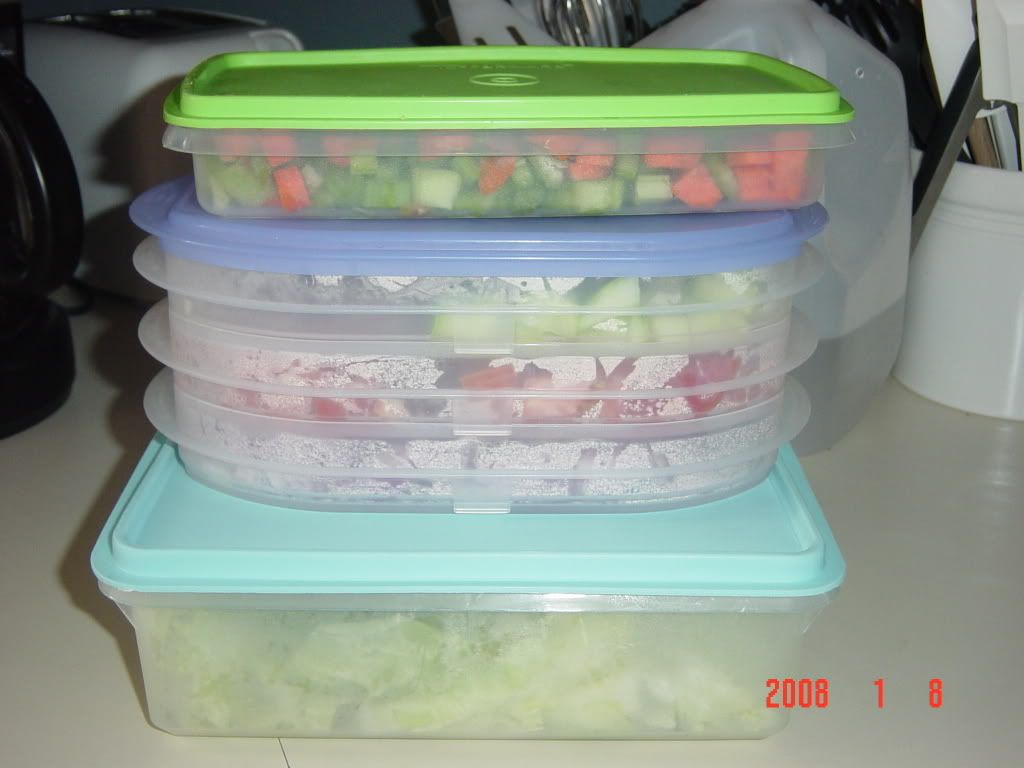
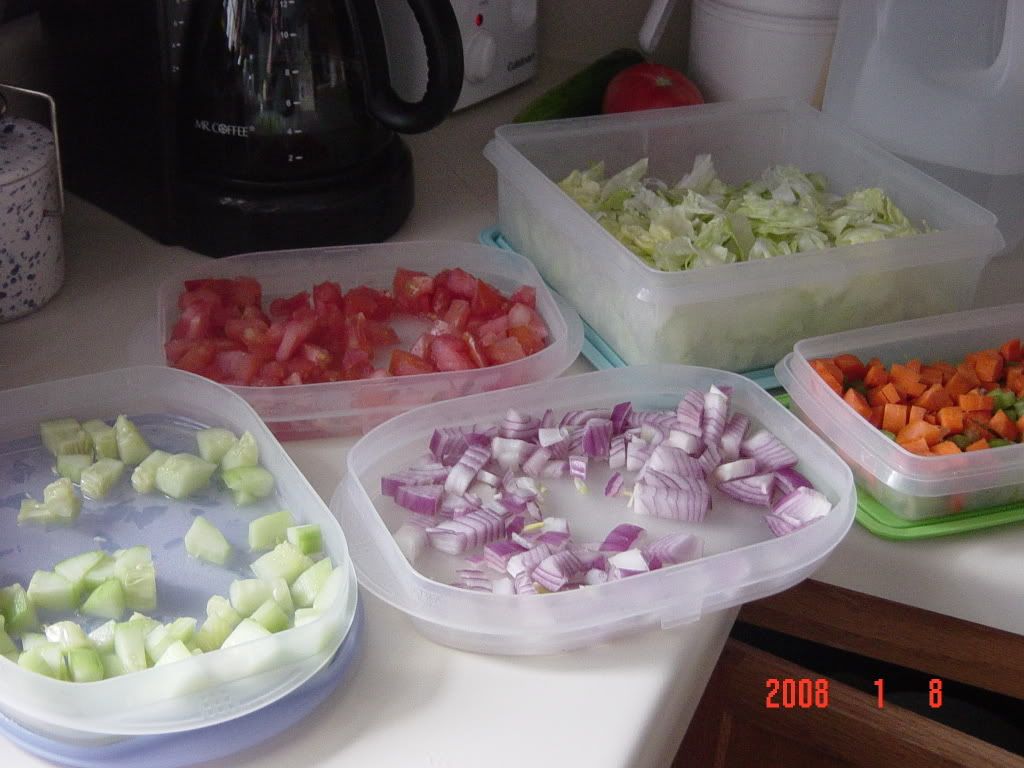
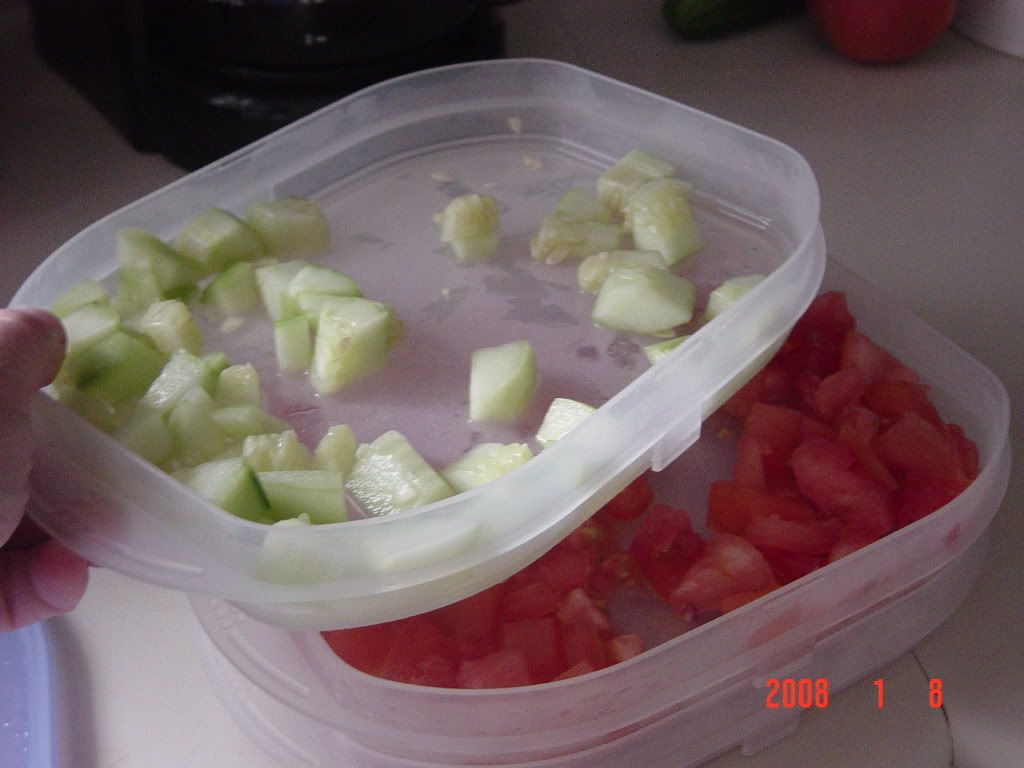
In an effort to actually use all my Tupperware that just remains stacked in my cabinet (had I known I prefer ziploc bags to containers, I probably wouldn't have made such an investment), I finally put to practice a great tip I've read over and over. That is to make your own salad bar so that when it comes time for a meal, everything is prepared and you just put it together.

My "brilliant" idea last night was to use the lunch meat keeper I have from Tupperware (don't know if that is the real name). It is one unit, in that it all snaps together, each layer being the lid to the container beneath, and it has a lid on top (see top picture - the one with the blue lid in the middle). This makes the most perfect salad bar! Knowing I have a salad-in-waiting all ready in the fridge makes life so much easier (and takes away the excuse that I don't have time to make a salad!)

Monday, May 21, 2007

Kettle Corn

I love kettle corn. Its a nice treat when we go to a fair of some sort. The other night I wondered if I could make it at home, and I found this recipe. It was SO good, and SO easy - I was surprised. Yesterday we went to a car show, and picked up some kettle corn, and I have to say, we all liked mine better! Here's the recipe!

Kettle Corn
Ingredients:

peanut oil (I just used vegetable oil)
1/4 cup popcorn
1/4 cup sugar
salt
pepper

Directions:Use a decent size pot (with a lid) and turn on the heat to medium high. Pour in enough oil to lightly coat the bottom. Don't use too much oil. Too much oil will sog the popped popcorn and you'll probably get sick to your stomach when you eat it. Dump in enough popcorn to make a single layer in the pot. Add a little bit of salt and pepper. When you see the corn start to get excited but before it starts to pop, quickly pour in the sugar as evenly as you can across the top. Cover and shake back and forth to pop (like Jiffy Pop). You can't pop every single kernel because you would scorch the popcorn. Also pouring in the sugar too soon tends to make the popcorn scorch more easily. Be sure to get the popped popcorn out of the pot as quickly as possible to prevent scorching from the residual heat in the pot.

Recipe from: http://www.degraeve.com/reference/recipes/kettlecorn.php

Be careful it was VERY hot! Make sure it is cooled a bit before letting your kids dig in. It took longer to cool down than regular popcorn.

Blessings!

Jen

Wednesday, May 2, 2007

Two New Favorite Things

I've discovered two things that have become favorite things:

1. Card Games from the dollar store. About once a week I make my way over to my local dollar store. For Easter that is where I found goodies for my kids, including two card games with a Bible theme - one is called Noah's Ark (played like Go-Fish) and the other is Bible Eights (played like Uno) both made by Martin Designs. My 4 year old son loves playing these! My 2 year old son also loves to look at the pictures. Just last night I bought the classic Old Maid - and all these games are for $1 - who can beat that! They have several more that I will pick up every few weeks - its a great way to spend time with my children.

2. Meatball Subs for Dinner. A fast and delicious (and I've learned to make them healthy) dinner that I found that we all love are meatball subs (or as a true New Englander such as myself calls them GRINDERS!) I buy frozen chicken or turkey meatballs (I found chicken meatballs at Sam's Club - (2 points for 3 meatballs fellow Weight Watchers-ers!)), and dump them in sauce (today I am making a homemade crockpot tomato sauce - enough to make other dinners throughout the next few weeks. Today I dumped a ton of meatballs in this sauce for dinner tonight. But the last time I made it I just dumped meatballs in jarred sauce and it was very yummy!) I then put meatballs and sauce on long whole grain rolls, put shredded part-skim mozzarella, and then broil them for a little bit. For the kids I take some of the sauce (these meatballs are really spicy) and cheese and I don't broil their grinders. Its an easy meal that my whole family loves! Serve with a salad or carrot sticks for the kids, and it is a real healthy and delicious meal!

Monday, March 26, 2007

Recipes


recipe
I just tried this recipe the other night and it was so good and so easy to make!
Taco Crescent Ring
2 packages crescent rolls
1 lb. ground beef (I use ground turkey)
taco seasoning (see recipe below for your own taco seasoning)
1 cup shredded lettuce
chopped tomatoes
green onions
1 cup sour cream
salsa
Brown meat and drain off grease. Add seasoning. Unroll crescent rolls and make into a circle (it looks like a sun when you are finished unrolling; the wide end of the crescent roll will be in the center of the circle). Add cheese to meat and stir. Place meat/cheese mixture on crescent rolls and wrap pointed edges around the meat mixture so it forms a ring. Bake at 375 degrees for 12 minutes. After baked, remove from cookie sheet unto a platter. On inside of ring place lettuce, tomato and green onions. Serve sour cream and salsa on side. Cut into wedges and serve.
Taco Seasoning
Combine the following:
2 teaspoons instant minced onion
1 teaspoon salt
1 teaspoon chili powder
1/2 teaspoon cornstarch
1/2 teaspoon crushed red peppers (I omit this)
1/2 teaspoon garlic powder
1/4 teaspoon oregano
1/2 teaspoon ground cumin

Stay, stay at home, my heart, and rest;
Home-keeping hearts are happiest,
For those that wander they know not where
Are full of trouble and full of care;
To stay at home is best.

Weary and homesick and distressed,
They wander east, they wander west,
And are baffled and beaten and blown about
By the winds of the wilderness of doubt;
To stay at home is best.

Then stay at home, my heart, and rest;
The bird is safest in its nest;
O'er all that flutter their wings and fly
A hawk is hovering in the sky;
To stay at home is best.
~Henry Wadsworth Longfellow